A PC that used to feel fast and now crawls through basic tasks is one of the most frustrating tech problems. The good news is that most slowdowns are software-related and fixable in under an hour without spending any money. This guide covers 12 steps you can take today, starting with the quickest wins and ending with hardware upgrades worth considering if software fixes are not enough.
1. Disable Startup Apps
Every app that launches at startup steals boot time and eats RAM before you even open a browser. Right-click the taskbar, open Task Manager, and click the Startup apps tab. Sort by “Startup impact” and disable anything you do not need immediately after login – Spotify, Discord, OneDrive, Teams, and Steam are common offenders. Disabling them here does not uninstall them; they just launch when you choose to open them.
2. Run Disk Cleanup
Windows quietly accumulates gigabytes of temporary files, old Windows Update downloads, and browser cache. Search for Disk Cleanup, select your C: drive, and let it scan. Click Clean up system files for a deeper scan that includes Windows Update leftovers – this often recovers 5 GB or more on a machine that has been running for a year. If you recently upgraded from Windows 10 to 11, the “Previous Windows installation(s)” entry alone can be 15-25 GB.
3. Adjust Power Settings
Windows defaults to Balanced power mode, which throttles CPU and GPU speed when the system is idle to save energy. On a plugged-in desktop or laptop, switch to High Performance or Ultimate Performance in Power Options. Search “power plan” in the Start menu to find this. On a laptop you will trade some battery life, so only use this when plugged in.
4. Update Windows and Drivers
Outdated drivers – especially GPU drivers – cause stutters and crashes that look like general slowness. Check Windows Update for pending system updates. For GPU drivers, download them directly from NVIDIA or AMD rather than relying on Windows to push them. If your PC uses Intel integrated graphics, grab the latest from Intel’s driver support page. Old chipset drivers are a less obvious culprit; find them on your motherboard manufacturer’s website.
5. Check for Malware
Cryptominers and adware running in the background are a common cause of mystery slowdowns. Windows Security (built into Windows 10 and 11) runs real-time protection by default, but run a full manual scan to be sure. Open Windows Security > Virus & threat protection > Scan options > Full scan. If you want a second opinion, Malwarebytes Free does a solid one-time scan without conflicting with Windows Security.
6. Adjust Visual Effects
Windows 11 in particular runs a lot of animations and transparency effects that look nice but consume GPU and RAM. Search “Adjust the appearance and performance of Windows” and select Adjust for best performance, or manually uncheck animations you do not care about. This makes the biggest difference on older machines with 4 GB of RAM or integrated graphics.
7. Free Up RAM
If Task Manager shows you are consistently using 85%+ of RAM with a normal workload, you are hitting a ceiling that no software fix can fully solve. Short-term: restart the PC (clears RAM entirely), close browser tabs you are not using, and check Task Manager’s Processes tab for anything consuming memory that you do not recognize. Long-term: see Step 12 below.
8. Defragment (HDD) or Optimize (SSD)
If your PC still has a spinning hard drive as its main drive, fragmentation is a real problem – files scattered across platters mean slower reads. Search Defragment and Optimize Drives and run it on your HDD. If you have an SSD, do not defragment it; Windows will show “Optimize” instead, which sends a TRIM command to help the drive manage its blocks. SSDs optimize automatically on a schedule, but you can trigger it manually.
9. Reinstall or Update Problem Apps
Some apps – antivirus suites especially – become bloated after years of updates and start consuming more resources than they did at install. If a specific app consistently spikes CPU or disk usage in Task Manager, try uninstalling it cleanly and reinstalling the latest version. For antivirus, this often resolves background scan conflicts that cause sustained disk thrashing.
10. Check Storage Health
A failing hard drive causes random slowdowns, file access delays, and crashes that look identical to software problems. Download CrystalDiskInfo (free) to read your drive’s S.M.A.R.T. data. A “Good” rating means the drive is healthy. “Caution” or “Bad” means back up your data immediately and start planning a replacement. SSDs can also degrade – CrystalDiskInfo shows total terabytes written, which you can compare against the drive’s rated TBW endurance.
11. Upgrade to an SSD
If your PC still boots from a spinning hard drive, upgrading to an SSD is the single biggest performance improvement you can make – more impactful than doubling RAM. A 500 GB SATA SSD costs around $45-$60. Boot times drop from 60-90 seconds to under 15. Apps open in half the time. File transfers speed up dramatically. You can clone your existing Windows installation to the new drive with free software like Macrium Reflect, avoiding a full reinstall.
Already have an SSD? If it is an older SATA drive and your motherboard has an available M.2 slot, upgrading to an NVMe SSD gives another noticeable jump in sequential read and write speeds – particularly useful if you work with large video or photo files. See our best NVMe SSDs in 2026 roundup for current recommendations.
12. Add More RAM
If you are running Windows 11 on 8 GB of RAM and regularly using Chrome, Office, and Zoom simultaneously, you will hit the ceiling often. Adding RAM to 16 GB is a cheap fix – DDR4 16 GB kits run $40-$60. DDR5 is pricier but has come down significantly. Check your motherboard’s manual or use Crucial’s System Scanner tool to confirm compatible speeds and maximum supported capacity before buying.
When to Consider a Clean Reinstall
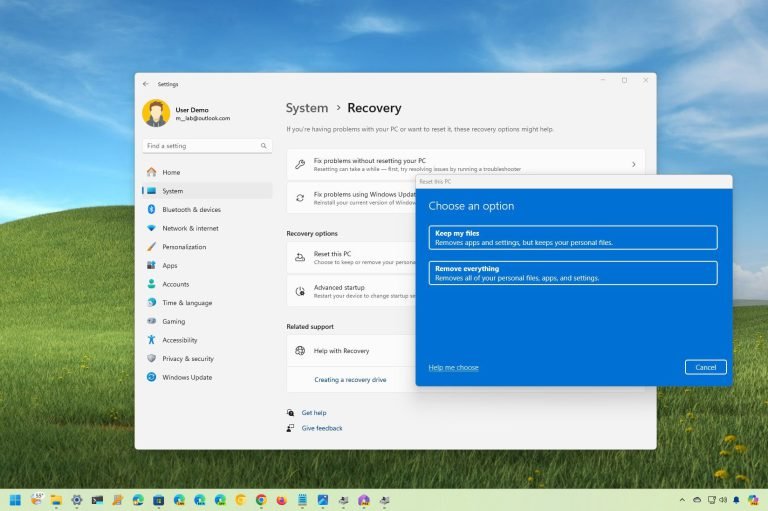
If you have tried all 12 steps and the PC is still slow, a clean reinstall of Windows is worth the effort. Years of software installs, registry changes, and accumulated cruft can genuinely degrade performance in ways that are hard to diagnose individually. Windows 11 makes this easier than ever: go to Settings > System > Recovery > Reset this PC and choose “Remove everything.” Back up your data first – this wipes the drive completely.
Quick-Reference Checklist
Disable unnecessary startup apps in Task Manager
Run Disk Cleanup including system files
Switch to High Performance power mode when on AC power
Update Windows, GPU drivers, and chipset drivers
Run a full malware scan
Reduce visual effects on low-RAM machines
Close unused browser tabs and background apps
Defragment HDD or TRIM SSD
Reinstall resource-heavy apps that have grown bloated
Check drive health with CrystalDiskInfo
Upgrade to SSD if still on spinning hard drive
Add RAM if consistently above 85% usage
Start at step 1 and work down the list – most users find the first four or five steps alone cut their boot times in half and make everyday use feel snappy again.
Buying a monitor is harder than it looks – resolution, panel type, refresh rate, and response time all interact with each other and with your specific use case. This guide cuts through the spec sheet to tell you what actually matters.
Most home Wi-Fi networks are running with factory settings that any attacker knows by default. These 8 changes – from updating the admin password to enabling WPA3 – close the most common vulnerabilities in under 20 minutes.
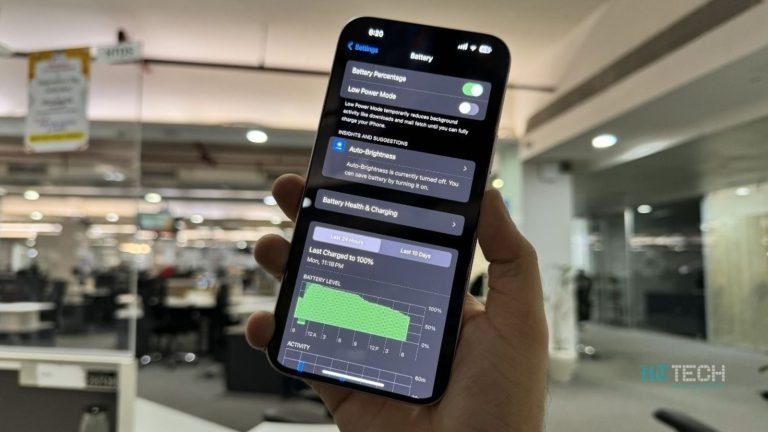
iPhone battery draining too fast? These 14 settings changes – from display brightness to background app refresh – can add hours to your day without turning your phone into a brick.
Factory resetting Windows 11 is simpler than you think. Whether you are fixing a broken system, selling your PC, or just starting fresh, this guide covers every reset option and which one is right for your situation.
Setting up a home network from scratch does not require a networking degree. This guide walks through choosing a router, positioning it correctly, securing your Wi-Fi, and wiring up devices that need the fastest speeds.