Adding more RAM is one of the most cost-effective PC upgrades you can make – a 16 GB DDR4 kit costs $40-$60 and can dramatically improve performance on a machine that is consistently hitting its memory ceiling. This guide covers how to find out what RAM your PC supports, how to pick the right kit, and how to install it without breaking anything.
Step 1: Check How Much RAM You Have and Are Using
Open Task Manager (Ctrl+Shift+Esc), click the Performance tab, and select Memory. This shows your total installed RAM, how much is in use right now, and how many slots are in use. If you are regularly at 80%+ memory usage with your normal workload, an upgrade will have a noticeable impact. If you are sitting at 40-50%, more RAM will not improve everyday performance much.
Step 2: Find Out What RAM Your PC Supports
Not every PC accepts every type of RAM. You need to match the generation (DDR4 vs DDR5), speed, and form factor. There are three reliable ways to check:
Crucial System Scanner: Visit Crucial’s website and download their free System Scanner tool. It reads your system’s specs and tells you exactly what RAM is compatible and available to buy.
Check your motherboard manual: Look up your motherboard model (find it in Task Manager > Performance > CPU > “Mother Board” or in System Information) and find the memory specs in the manufacturer’s product page or manual.
CPU-Z: Download CPU-Z (free), open it, and click the Memory tab to see your current RAM type, speed, and configuration.
Key specs to match:
Generation: DDR4 and DDR5 are not physically compatible – the slots are different
Speed: Your RAM runs at the speed the motherboard supports, even if the sticks are faster (e.g., DDR4-3600 sticks in a board that maxes at DDR4-3200 will run at 3200)
Maximum capacity: Motherboards have a max RAM limit – common limits are 32 GB and 64 GB for consumer boards
Number of slots: If Task Manager shows 2 slots and both are in use (e.g., 2 x 8 GB = 16 GB), you need to replace the sticks, not add to them
Step 3: Buy the Right RAM Kit
Always buy RAM as a matched kit (two sticks sold together) rather than individual sticks. Matched kits are tested together by the manufacturer and run in dual-channel mode, which gives noticeably better performance than two mismatched sticks.
For most tasks – web browsing, Office, general multitasking – DDR4-3200 is the sweet spot. For AMD Ryzen systems, faster RAM (DDR4-3600) improves performance more noticeably than on Intel systems due to how the Infinity Fabric interconnect works. For gaming builds, 16 GB is the current minimum with 32 GB becoming the new standard as modern games push beyond 16.
Reliable RAM brands: Corsair, G.Skill, Kingston, Crucial, TeamGroup. Any reputable brand with a lifetime warranty is fine for home use.
Step 4: Install the RAM (Desktop)
You will need: a Phillips-head screwdriver, an anti-static wrist strap (optional but recommended), and about 15 minutes.
Power down the PC completely and unplug it from the wall. Press the power button once after unplugging to discharge residual electricity.
Open the case – typically one or two screws on the rear panel, then slide or swing the side panel off.
Ground yourself – touch the metal case frame before touching any components to discharge static electricity.
Locate the RAM slots – long thin slots near the CPU with locking clips on each end.
Check which slots to use: Consult your motherboard manual for the correct slots for a 2-stick configuration. Most boards recommend using slots 2 and 4 (labeled A2 and B2) rather than slots 1 and 2, for dual-channel operation. Using the wrong slots disables dual-channel mode and cuts bandwidth roughly in half.
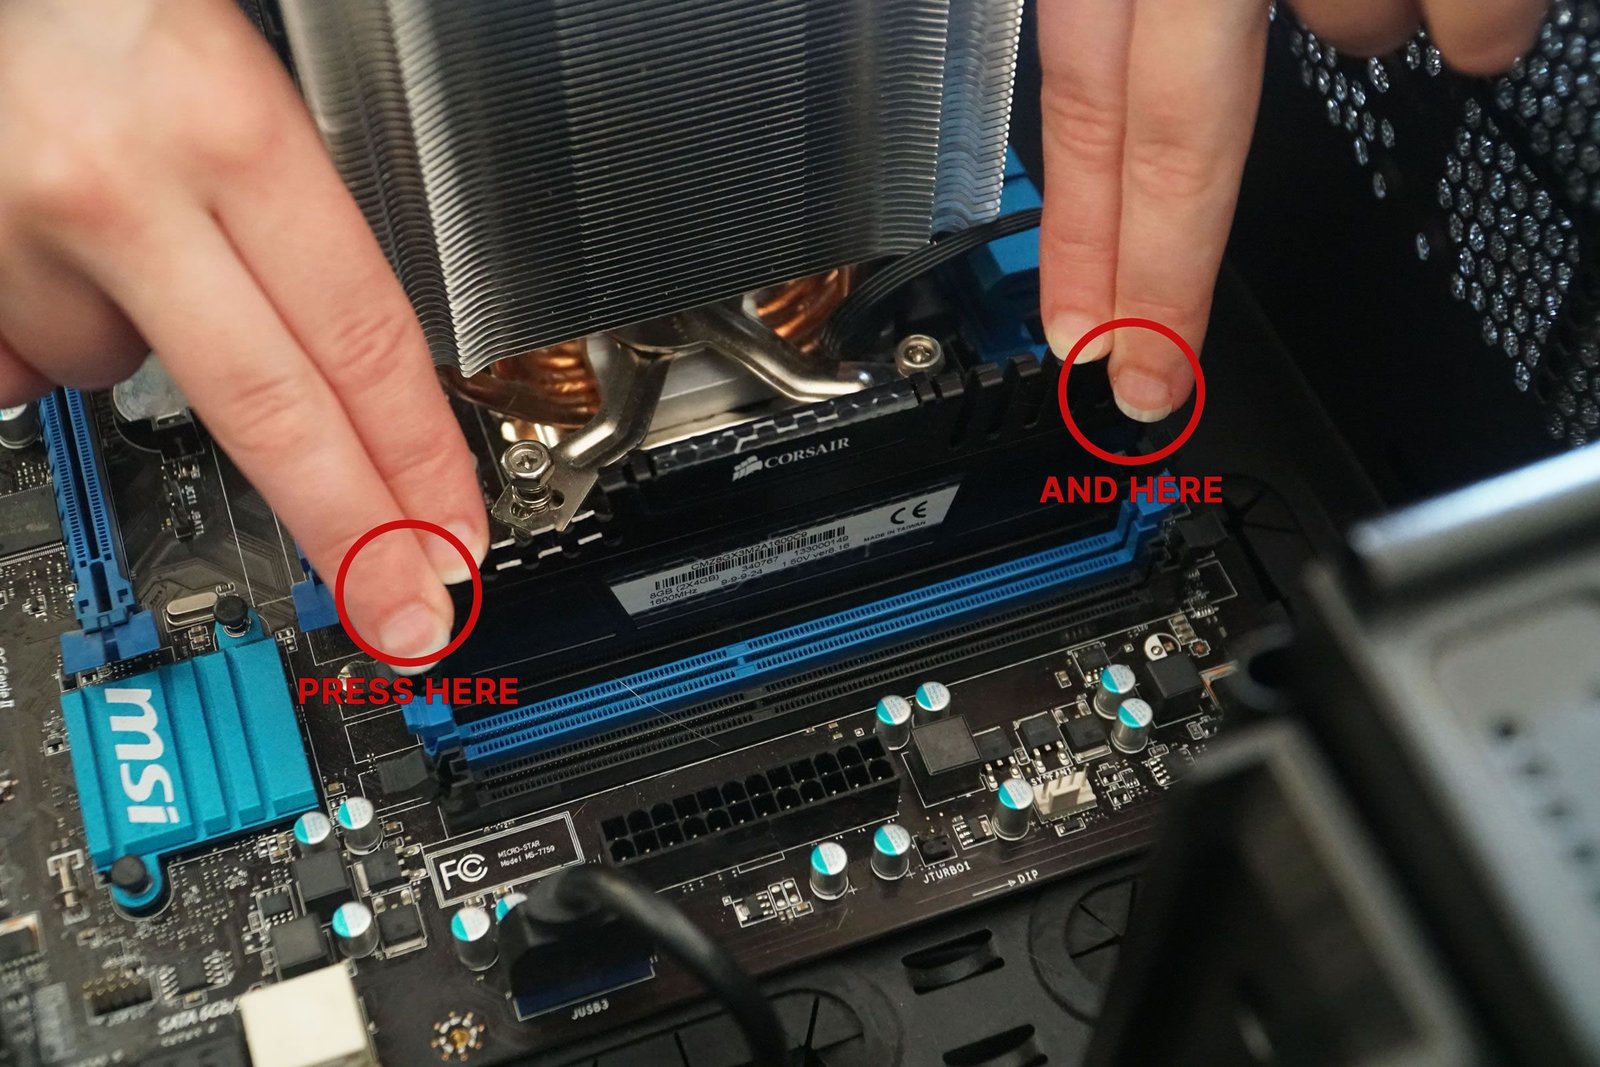
Release the locking clips on both ends of the target slots by pushing them outward.
Align the RAM stick – there is a notch in the connector that only allows it to go in one way. Line up the notch with the slot key.
Press firmly and evenly on both ends of the stick until the locking clips click into place on both sides. You need more force than feels comfortable – if they are not clicking, press harder with thumbs on each end simultaneously.
Repeat for the second stick in the paired slot.
Close the case, plug in the power cable, and boot the PC.
Step 5: Verify the Upgrade
When the PC boots, check that it recognizes the new RAM. Open Task Manager > Performance > Memory and confirm the total matches what you installed. If it shows less, a stick may not be seated properly – power off and reseat it.
To enable XMP/EXPO (the RAM’s rated speed profile rather than the default slower speed), enter the BIOS on the next boot (tap Delete or F2 at startup) and enable XMP (Intel) or EXPO (AMD). Without this, DDR4-3600 RAM runs at 2133 MHz by default – you are leaving performance on the table.
Laptop RAM: Is It Upgradeable?
Many modern laptops – particularly thin and light models like the MacBook Air, Dell XPS 13, and most Ultrabooks – have RAM soldered to the motherboard and cannot be upgraded. Before buying a laptop expecting to upgrade RAM later, check the manufacturer’s specs page. If it says “onboard memory” or “LPDDR” without mentioning expansion slots, the RAM is fixed. Desktops and gaming laptops are more likely to have upgradeable RAM slots.
For a look at how RAM capacity affects real gaming performance in a complete build context, see our $1,000 gaming PC build guide which covers the memory configuration choices in detail.
Factory resetting Windows 11 is simpler than you think. Whether you are fixing a broken system, selling your PC, or just starting fresh, this guide covers every reset option and which one is right for your situation.
GPUs power gaming, AI, and video editing. This explainer covers how a graphics card actually works, why GPUs are so much better at parallel tasks than CPUs, and what VRAM does.
Buying a monitor is harder than it looks – resolution, panel type, refresh rate, and response time all interact with each other and with your specific use case. This guide cuts through the spec sheet to tell you what actually matters.
Sending a PDF with sensitive information? Locking it with a password takes under a minute. This guide covers free methods on Windows and Mac, Microsoft Word, and when a free online tool is safe to use.
Ad blocking speeds up page loads, reduces tracking, and cuts data usage. This guide covers browser extensions, iOS and Android ad blocking, and Pi-hole for network-wide blocking that covers every device at once.
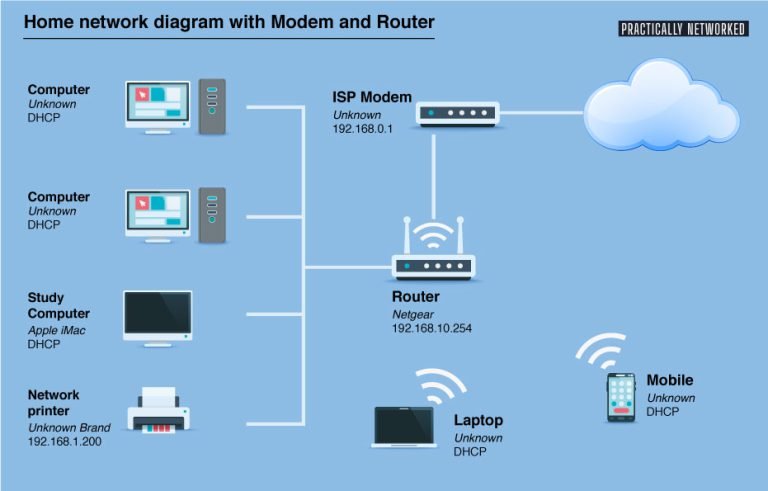
Setting up a home network from scratch does not require a networking degree. This guide walks through choosing a router, positioning it correctly, securing your Wi-Fi, and wiring up devices that need the fastest speeds.


")