How to Clean Install Windows 11: Step-by-Step Guide for 2026
A clean install of Windows 11 gives you a fresh operating system with no accumulated software, registry bloat, or leftover drivers from old hardware. It takes about 45-60 minutes and results in noticeably faster boot times and a more responsive system. This guide covers the full process: preparing, creating installation media, installing, and getting Windows activated and up to date.
Before You Start: What You Need
- A USB flash drive with at least 8 GB of free space (this will be erased)
- Your current Windows 11 license key, OR confirmation that your PC is already digitally linked to your Microsoft account (most Windows 10/11 upgrades work this way)
- A complete backup of all files you want to keep – a clean install wipes everything on the drive
- A list of software you will need to reinstall and any license keys for paid apps
Step 1: Check Your Windows License
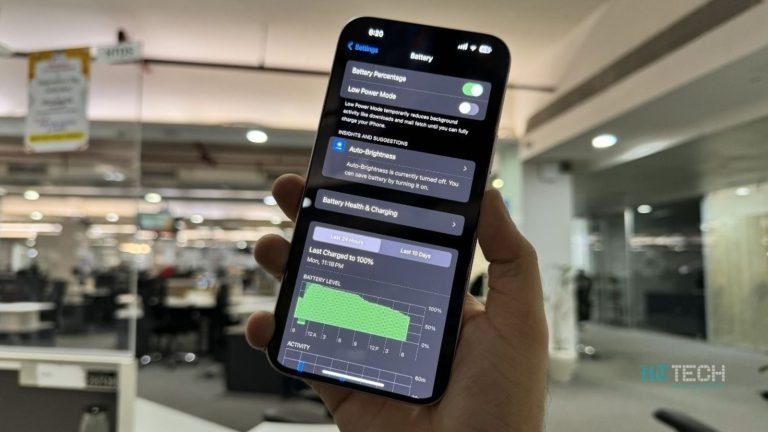
Most Windows 11 PCs use a digital license tied to your Microsoft account, not a product key you need to type. After reinstalling, simply sign into your Microsoft account and Windows activates automatically. To confirm this is the case, go to Settings > System > Activation. If it says “Windows is activated with a digital license linked to your Microsoft account,” you are covered. If it shows a product key or OEM activation, note that information before proceeding.
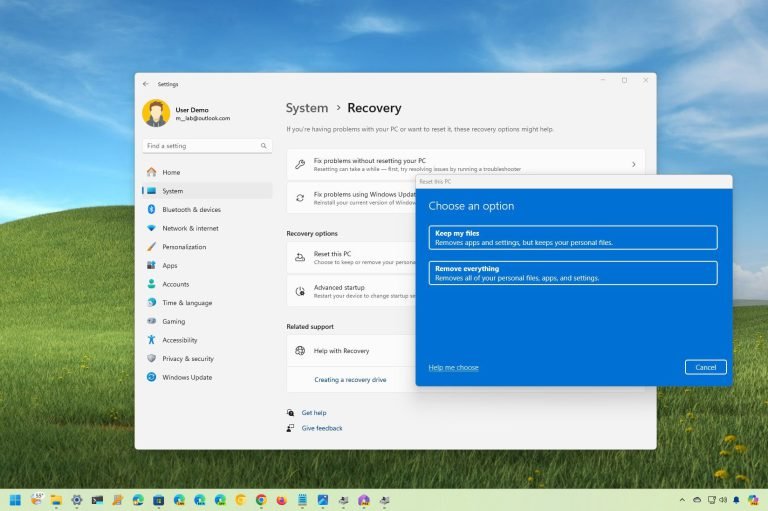
Step 2: Back Up Everything
This step is non-negotiable. A clean install erases your C: drive. Back up documents, photos, downloads, Desktop files, and anything in AppData you care about (browser profiles, game saves). Connect an external hard drive or copy critical files to cloud storage before touching anything else. Once you start the install, there is no going back.
Step 3: Download the Windows 11 Installation Media Tool
Microsoft provides a free Media Creation Tool that downloads the latest Windows 11 ISO and writes it directly to your USB drive. Download it from Microsoft’s official Windows 11 download page. Run the tool, accept the license, and select Create installation media (USB flash drive, DVD, or ISO file) for another PC. Choose your USB drive as the destination. The tool downloads Windows 11 (around 5 GB) and prepares the drive automatically. This takes 15-30 minutes depending on your internet speed.
Step 4: Boot from the USB Drive
With the USB drive plugged in, restart your PC and enter the BIOS/UEFI. The key to press during startup varies by manufacturer:
- Dell: F12
- HP: F9 or Esc
- ASUS: F8 or F2
- MSI: F11
- Lenovo: F12 or Fn+F12
In the boot menu, select your USB drive. If you do not see it, check that the USB drive is inserted properly and that Fast Boot is not preventing the BIOS from detecting it – temporarily disable Fast Boot in BIOS settings if needed.
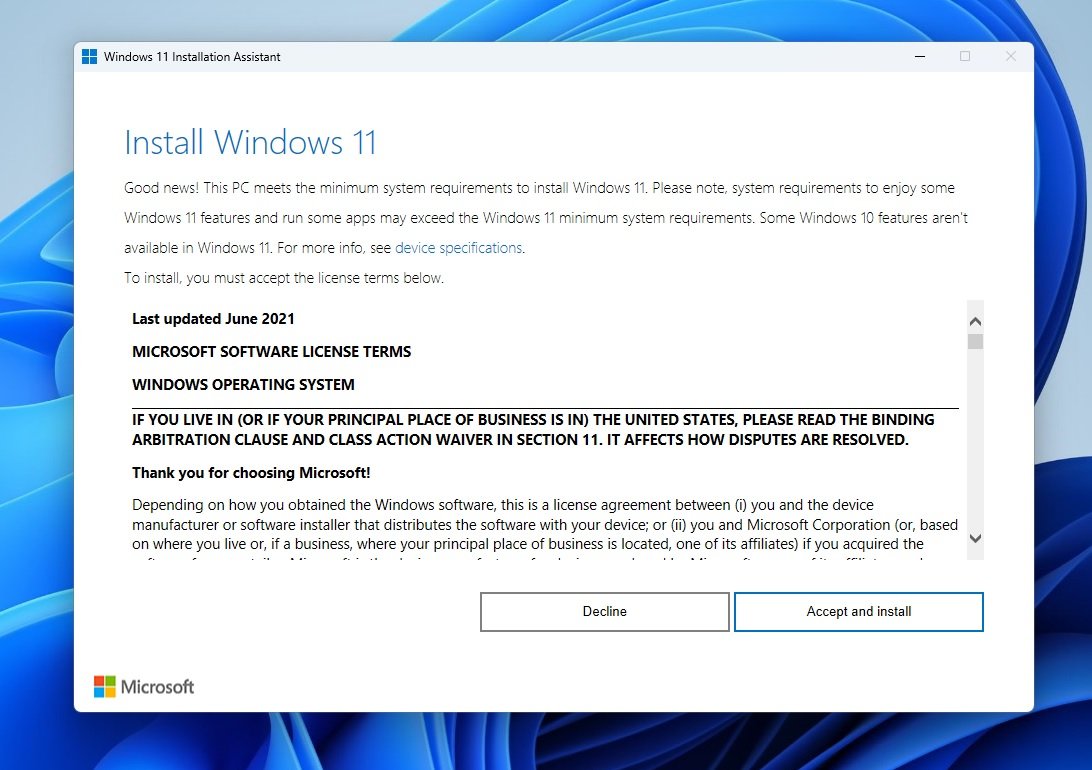
Step 5: Run the Windows 11 Installer
- Select your language, time, and keyboard layout. Click Next, then Install now.
- When asked for a product key, click I don’t have a product key if your license is digital – it will activate automatically after install when you connect to the internet and sign into your Microsoft account.
- Select the Windows 11 edition that matches your existing license (Home or Pro).
- Accept the license terms.
- Choose Custom: Install Windows only (advanced) for a clean install.
- Select your drive or partition. For a true clean install, delete all existing partitions on the target drive (this erases everything), select the unallocated space, and click Next. Windows creates the necessary partitions automatically.
- Installation runs automatically – the PC will restart several times. Do not remove the USB drive until the install completes.
Step 6: Initial Setup
After installation completes, Windows 11 walks you through the out-of-box experience (OOBE): region, keyboard layout, network connection, and Microsoft account sign-in. Sign into your Microsoft account and Windows will detect the digital license and activate automatically. Skip Cortana setup and the extra Microsoft services unless you specifically want them.
Skipping the Microsoft account requirement: Windows 11 Home forces you to sign in with a Microsoft account during setup. To bypass this on a network-connected PC, disconnect from Wi-Fi before the sign-in step (unplug Ethernet, turn off Wi-Fi adapter). When it says “Let’s connect you to a network,” click “I don’t have internet” if the option appears, or use the Shift+F10 workaround to open Command Prompt and run oobebypassnro to restart OOBE with a local account option.
Step 7: Install Drivers and Updates
Immediately after reaching the desktop, run Windows Update and install everything available. This includes driver updates for common hardware. Then visit your motherboard manufacturer’s website for chipset drivers, and NVIDIA or AMD’s website for GPU drivers. Do not rely on Windows Update alone for GPU drivers – it often lags behind current releases.
If you have a dedicated NIC, Wi-Fi card, or audio interface with specific drivers, install those next before anything else.
Step 8: Reinstall Your Software
With drivers sorted, reinstall your core applications. A useful approach: use a tool like Ninite (free) to install multiple apps at once – Chrome, VLC, 7-Zip, and others – in a single pass without installer bloatware. For paid software, retrieve your license keys from email records or a password manager before installing.
After reinstalling, disable startup apps you do not want running at boot (see our PC speed-up guide for the full checklist). A fresh Windows 11 install on a modern NVMe SSD boots in 8-12 seconds – keep it that way by being selective about what runs at startup.